Singer 5160 Bedienungsanleitung
Stöbern Sie online oder laden Sie Bedienungsanleitung nach Nähmaschinen Singer 5160 herunter. SINGER 5160 User Manual Benutzerhandbuch
- Seite / 125
- Inhaltsverzeichnis
- LESEZEICHEN
- AT HOME WORLDWIDE 1
- For European Territories: 2
- Instruction Book 3
- Singer 5160 4
- Important Safety Instructions 6
- PERSONNELS: 8
- Table of Contents 9
- Ojales y botones 10
- Funciones de la máquina 10
- Mantenimiento 10
- Conozca su maquina de coser 14
- Accessories 16
- Accesorios 17
- Accessoires 17
- Connecting 18
- (110/120 V O 220/240 V) 19
- Selectors 20
- Selectores 21
- Sélecteurs 21
- Pattern selector dial 22
- Stitch balance selector 22
- Selector de bordados 23
- Changing a 24
- Cambiar el pie 25
- Changement des 25
- Removing the shank 26
- Changing a needle 26
- EL PIE CALZADOR 27
- LAS AGUJAS 27
- Attatching feed 28
- Instalación 29
- Montase du 29
- Pattern table 30
- Tabla de puntos 32
- A A A A 33
- ^ \ / \ / \ / \ 33
- Tableau de points 34
- (I) Œ) CE) Cl) 35
- Œ) CD (1) C<£) 35
- Winding a bobbin 36
- Devanado de la 37
- Remplissage de 37
- (f¡3^ 4h 39
- Inserting a bobbin 40
- Colocación de 41
- Mise en place 41
- Threading the 42
- Enhebrado en la 43
- Enfilase de la 43
- Raising the bobbin 46
- Tirar el hilo de 47
- Remontage du fil 47
- Adjusting thread 48
- Ajuste de la 49
- Réglage de la 49
- Fabric 50
- Tabla de telas 51
- Tableau de tissus 51
- Starting a seam 52
- Comience a coser 53
- Commencement 53
- Straight stitching 54
- Costura recta 55
- Couture droite 55
- Zigzag stitching 56
- Costura zi^zas 57
- Couture de zÌ2^0S 57
- Blind hem stitching 58
- Dobtadilo de Concha: 59
- Decorative stitch 60
- Flexible stitch 62
- "I” 63
- "I” ) 64
- Puntada tipo 65
- Point type 65
- One-step 66
- Ojalador automá 67
- Boutonnière auto 67
- (fis- 3) 69
- Balancing the 70
- Regulación del 71
- Equilibrage de la 71
- Attatching a button 72
- Inserting a zipper 76
- Colocación de 77
- Pose de fermetures 77
- Slissières 77
- RECOAAMENDED INITIAL SETTINGS 78
- Reprisage 79
- Gathering 80
- Recogido 81
- Overcasting 82
- Sobrehilado 83
- Sur fi lase 83
- Monogram and 84
- Embroidering 84
- Monogramas у 85
- Monogrammes et 85
- Appliqués 86
- Aplicaciones 87
- Twin needle 88
- Coser con 89
- Couture à aiguille 89
- French Seam 90
- Couching 90
- Almohadar 91
- Couchins 91
- Topstitching 92
- Elastic application 92
- Surpiqûre 93
- Application 93
- D'Elastique 93
- Lace Application 94
- Piping (Cording) 94
- Golonner-Biaiser 95
- Bar tack 96
- PresUías de Barra 97
- -, itf- ^ ' 97
- Quilting functions 98
- Función quìlting 99
- Fonctions de 99
- Courtepointe 99
- Staystitching 100
- Remendar 101
- Pespunte Fijo 101
- Raccommodage 101
- Baste Stitching 102
- Puntada para Hilvanar Faufll 103
- Sobrecostura 103
- Couture Rabattue 103
- Smocking 104
- Cording & Shirring 106
- Shirring 106
- RECOMMENDED INITIAL SETTINGS 108
- Ourlet Roulotté 109
- Free-arm sewing 110
- Coser con el 111
- Couture avec le 111
- Removing the 112
- Retirar la placa 113
- Retirer la plaque 113
- Removing and 114
- (fis- V 115
- Changing the light 116
- Cambiar la 117
- Changer l'ampoule 117
- Cleaning 118
- Limpieza de 119
- Nettoyase 119
- Lubricating 120
- Lubricación de 121
- Lubrification 121
- Performance checklist 122
- ^ IN U t K 123
Inhaltsverzeichnis
SINGERAT HOME WORLDWIDE5160Instruction Book Manual de Instrucciones Manuel d'instructions
SINGERIndiceConozca su máquina de coserPartes... 12Accesorios...
SINGERMendingRECOMMEi iDED INITIAL SETTINGS• Pattern' Multi-stitch Zigzag• Stitch width; Largest - 6mm• Stitch length: Fine (0.5 - 1.0)• Foot: Ge
SINGERRemendarAJUSTES INICIALES RECOMENDADOS Patrón: Zigzas múltiple Largo puntada: Fina (0.5 - 1.0)• Ancho puntada: La más larga - 6mm Pie: para u
SINGERRECOMMENDED INITIAL SETTINGS• Pattern: Straight Stitch• Stitch width: Straight• Stitch length: Longest (5)• Foot: General Purpose• Needle Thread
SINGERPuntada para Hilvanar FaufllRECOMMENDED INITIAL SETTINGS• Patrón: Puntada recta• Ancho puntada: Recta• Largo puntada: La más larga (5)• Pie: Par
SINGERSmockingRECOMMENDED INITIAL SETI'INGS• Pattern: Straight Stitch Stitch width: Straight• Stitch length: Longest (5)• Foot: General Purpose
SINGERNido de AbejasAJUSTES INICIALES RECOMENDADOS• Patrón: Puntada recta• Ancho puntada: Recta• Largo puntada: La más larga (5)• Pie: Para uso genera
SINGERCording & ShirringThe Cording Foot is a versatile accessory that is used for shirring or applying trims.Applying Cords, Trims or Thin Braids
SINGERAcordonados 8t FruncierEste pie para acordonados es un accesorio muy versatile que se utiliza para plegar fruncir y para aplicar adornos.Aplican
SINGERRolled HemThe Rolled Hem Foot aids in rolling the fabric’s edge. This foot is designed to sew straight, so avoid curves and sharp turns.RECOMMEN
SINGERDobladillosOurlet RoulottéEste pie dobla la orilla de la tela. Está diseñado para coser recto, evitar curvas y giros bruscos.AJUSTES INICIALES R
SINGERIndiceFaîtes connaissance avec votre machinePièces... 13Accessoires...
SINGERFree-arm sewingIt is possible to remove the cloth plate of your sewing machine. This allows easier sewing for trousers hems, sleeves and elas
SINGERCoser con el brazo libreEn su máquina de coser es posible remover la extensión de la base. De esta manera, su máquina será capaz de ejecutar c
SINGERRemoving the needle plateBEFORE REMOVING NEEDLE PLATE, UNPLUG THEMACHINE FROM SOCKET OUTLET.The needle plate is removed only for cleaning
SINGERRetirar la placa de la agujaANTES DE REMOVER LA PLACA DE LA AGUJA, DESCONECTE LAMAQUINA.La placa de la aguja se retira solamente para la
SINGERRemoving and replacing the bobbin caseTo remove bobbin case1. Open slide plate and remove bobbin.2. With a small screv/driver, turn and take ho
Retirar y colocar la cápsula de la bobinaSINGERRetirer et replacer le support de bobinePara remover la cápsula de la bobina Pour retirer le support de
SINGER Changing the light bulbBEFORE CHANGING LIGHT BULB, UNPLUGAAACHINE FROM ELECTRIC OUTLET.Use original SINGER light bulbs only (code 988076).Remov
SINGERCambiar la lámparaANTES DE CAMBIAR LA LAMPARA DESCONECTELA MAQjUINA Y EL PLUG DEL ENCHUFE.Use solamente lámparas originales Singer (cód.988076).
SINGER Cleaning the machineBEFORE CLEANING THE A^ACHINE, UNPLUG IT FROM ELECTRIC OUTLET.The machine surfaces and covers can be cleaned with a damp, so
SINGERLimpieza de la máquinaANTES DE LIMPIAR SU MAQUINA DESCONECTE LA MA(IUINA Y EL PLUG DEL ENCHUFE.La superficie y las tapas pueden limpiarse con un
SINGER
SINGERLubricating the machineBEFORE LUBRICATING THE /MACHINE, UNPLUG IT FROM ELECTRIC OUTLET.Your sewing machine will need to be lubricated acc
SINGERLubricación de la máquinaANTES DE LUBRICAR SU MAQUINA DESCONECTE EL PLUG DEL ENCHUFE.La frecuencia con que se debe lubricar la máquina depe
SINGERPerformance checklistNeedle does not moveIs machine connected to electricaL supply?Is the power and light switched on?Is speed control pedal con
^ IN U t KVerificadón de defectos eventualesLa aguja no se mueve¿ Está el plus conectado al enchufe ?I Está el Interruptor encendido?¿ Está el control
SINGERGuide pour la vérification des problèmesL'aiguille ne bouge pasAvez-vous branchez la machine?L'intérrupteur est-il connecté?Le rhéosta
Part number / Pieza n° / Pièce n° : 358366-001Printed in Brazil / Impreso en Brasil Imprimé au Brésil - Eng./Spa./Fren.
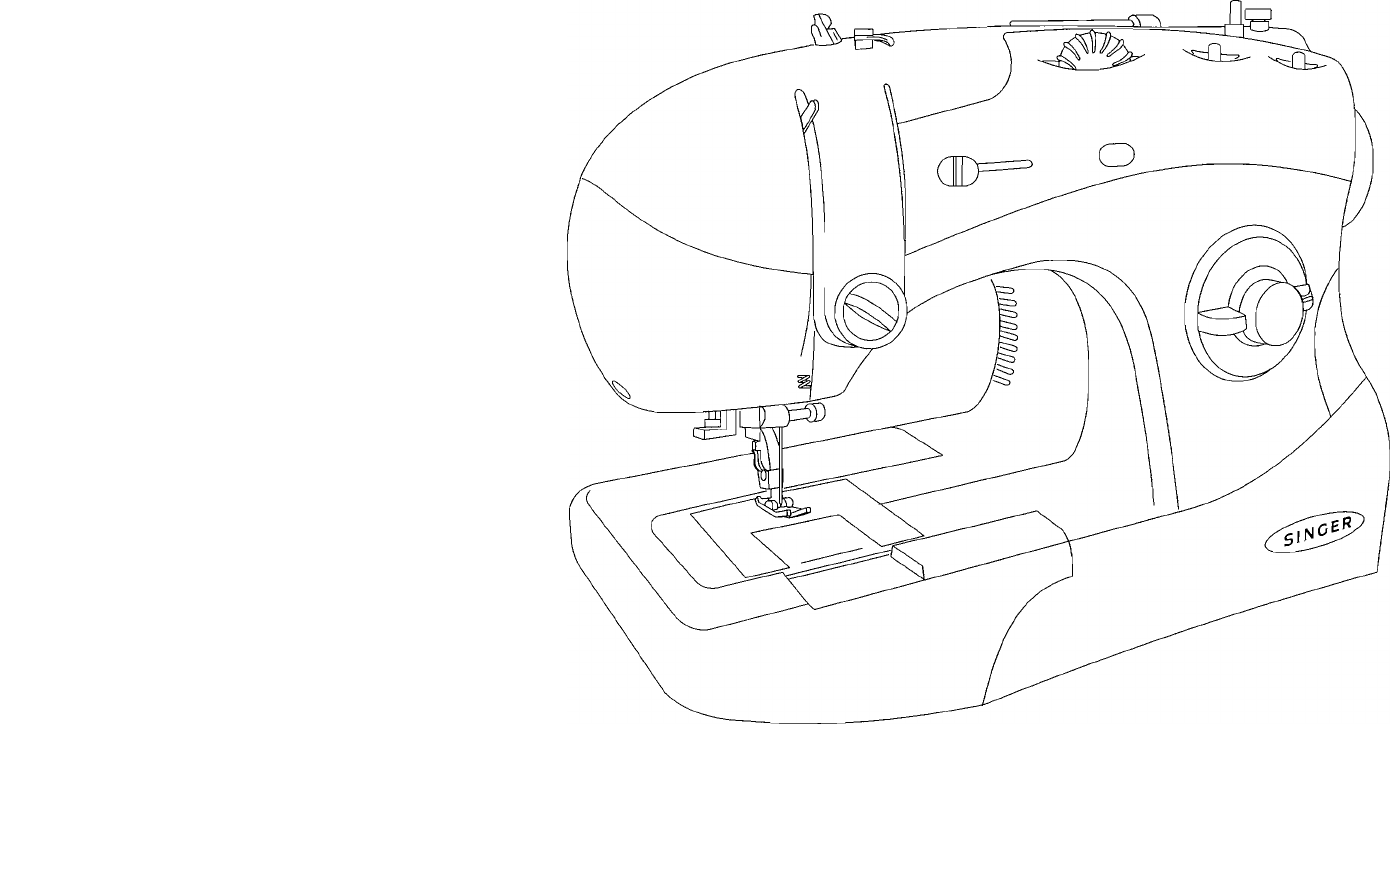
SINGERGetting to know your sewing machineParts1. Thread guide19. Presser foot disengaging lever2. Bobbin winder tension disc20.Feed system3. Thread gu
SINGERConozca su maquina de coserPartes1.Guía hilo19.Palanca de desencaje del prénsatela2. Tensor devanador de la bobina20. Dientes3.Guía hilo 21.Plac
SINGERFaites connaissance avec votre machinePièces1.Guide-fil19.2.Ressort de tension du fil20.3. Guide-fil21.4.Porte-bobine horizontal22.5. Dévidoir23
SINGERAccessories1. Singer Oil2. Screwdriver3. Spool pin holder (large)4. Spool pin holder (small)5. Buttonhole presser foot6. Blind hem presser
SINGERAccesoriosAccessoires1.Aceite Singer1. Huile Singer2.Destornillador1. Tournevis53.Prendedor para porta carretel3. Grand étrierlin4.Prendedor par
SINGERConnecting and running the machineBEFORE PLUGGING THE AAACHINE, CHECK IF THE ELECTRIC POWER IS COMPATIBLE WITH THE AAACHINE VOLTAGE (110/120V
SINGERConectar y accionar la maquinaANTES DE CONECTAR SU MAQUINA EN EL ENCHUFE,VERIFIQUE SI LA RED ELECTRICA DE SU DOMICILIO ESCOMPATIBLE CON EL VOLTA
For European Territories:This Singer Sewing Machine was tested according to European norms and meets the requirements regarding electrical safety radi
SINGERSelectorsNeedle position selectorThis selector positions the needle in the center, left and right positions. The central position is the
SINGERSelectoresSélecteursSelector posición de la agujaEste selector posìcìona la aguja al centro, a la Izquierda y a la derecha. La posición
SINGERPattern selector dialIt selects the stitch type. It has 9 positions, from "A" to "I". The letter "A" indicates but
SINGERSelector de bordadosSelector de puntos: Posee 9 posiciones para escoger el tipo de punto. La posición es solamente para el ojala
SINGERChanging a snap-on presser footTURN OFF THE MACHINE BEFORE CHANGING A PRESSER FOOT.Your machine is assembled with a general purpose
SINGERCambiar el pie prénsatelasDESCONECTE LA Á^dUINA ANTES DE CAMBIAR EL PRENSATELASEn su máquina viene montado el prénsatelas de uso gener
SINGERRemoving the shankTURN OFF THE A^ACHINE BEFORE REMOVING THESHANK.1. Turn hand wheel until the needle is in its highest position and lift the pr
SINGERRetirar el pie calzadorDESCONECTE LA MAQUINA ANTES DE RETIRAREL PIE CALZADOR.1. Gire el volante hasta que la aguja se encuentre en su
StN CERAttatching feed cover1. Turn hand wheel until the needle is in its highest position and liftthe presserfoot.2. Openthe slide plate.3. Slide
SINGERInstalaciónde la placa cubreimpelentes1. Gire e! volante hasta que la aguja se encuentre en suposición más aita/levante eipie calzado
SINGER5160Instruction BookManual de InstruccionesManuel d’instructions©Registered trademark of the The Singer Company Limited. Copyright @2004
SINGERPattern tableThe pattern stitch dial allows you to choose the type of stitch you want.Refer to this table as a guideline for a bette
SINGERTc)CD CE) D) CDCDA..A../\A A A / \ / \ f \ 1 \V V V VVYY'\ m\ m\ ml \wl \A /A A WWWAAV\Blind hem stitchMulti-ZigZagstitchReverse blind hemC
SINGERPTabla de puntosEl r.i:lector ííí? bordados permite escocer fácilmente el tipo de bordado deseado.Siempre que lo desee, utilice esta tabla para
SINGERCDC D(Y)(JjA..A..AA A A A ^ \ / \ / \ / \V V V VV"VY'w%r\A r\ A \J VJ VJ/'WV\Puntada InvisiblePuntada Zigiag multiplePunto invisi
SINGERTableau de pointsc «S3 Cf> C pÆ O O ^ ÜЦ^ìOLe sélecteur des broderies permet de choisir facilement la categorie de broderie souhaité
SINGER(ç)Œ) (x) (I) Œ) CE) Cl)A__A__AA A A A / \ / \ / \ / \V V V VVVY'\ m\ /\WA WvV'/ \WN \A M A WWW/vw\InvisibleZig-zag multiplePoint invi
St NG ERWinding a bobbin1. Turn off the machine. Open the bobbin visor and remove the empty bobbin.2. Lift the presser foot and press
SINGERDevanado de la bobinaf. Desconecte la máquina. Abra el visor у retire la bobina vacía que se encuentra en la caja de bobina.2. Levante e
SINGER5. Pass thread end through bobbin winder tension disc (illustration 4).6. Pass thread end, from inside through small hole in ri
SINGER5. Pase el hilo por el tensor del devanador de bobina (f¡3^ 4h6. Pase el hilo por el pequeño hoyo de la bobina, desde dentro hacia afuera.7.
SINGERSinger 5160Congratulations for choosing a Singer Sewing Machine!As the owner of a new SINGER sewing machine, you are about to begi
SINGERInserting a bobbinDO NOT FORGET TO SWITCH OFF THE AAACHINE WHILE WORKING IN THE BOBBIN AREA.1. Lift presser foot.2. Turn hand wheel
SINGERColocación de la bobinaRECUERDE DESCONECTAR LA MAQUINA SIEMPRE QUE VAYA A UTILIZAR EL AREA DE LA BOBINA.1. Levante el pie calzador.
SINGERThreading the machine1. Place spool on spool pin. Use the correct spool pin holder to hold spool firmly in place.2. Lift the presse
SINGEREnhebrado en la maquina1. Coloque el carretel de hilo en el porta carretel. Sujételo con el prendedor adecuado.2. Levante el pie calzador y gi
SINGER8. To pass the thread through the spiral thread guide, start from the left, making a circular clockwise movement with your hand twic
SINGER8. Рага pasar el hilo por el guía hilo espiral, empiece por la izquierda haciendo un movimiento circular con la mano, en el sentido horario, po
SINGERRaising the bobbin thread1. Liftpresserfoot.2. Hold needle thread loosely with left hand. Turn hand wheel toward you, lowering the need
SINGERTirar el hilo de la bobinai. Levante el pie calzador.Z. Con la mano izquierda sujete el hilo de la a^ujCL Gire el volante en su dirección, h
SINGERAdjusting thread tensionThe correct tension is an important factor because too little tension or too much tension will cause loo
SINGERAjuste de la tensión del hiloLa tensión correcta es importante porque poca o demasiada tensión dará lugar a una costura frágil o recogerá el gén
SINGERSinger 5160Singer 5160Felicitaciones por elegir una maquina Singer!Сото proprietaria de la nueva máquina de coser SINGER, usted comenza
SINGERFabric, thread and needle tableThe needle and thread you choose will depend upon the cloth being sewn.The table is a practical guide to needle a
SINGERTabla de telas agujas e hilosLa asuja y el hilo deben ser escogidos de acuerdo con la tela a ser trabajada.La tabla al lado es un guía práctico
SINGERStarting a seam1. Turn hand wheel toward your direction until the needle is in its highest position and lift the presser foot.2. Place cloth
SINGERComience a coserí. Gire el volante en su dirección hasta que la aguja se encuentre en su posición más alta y levante el pie calzador.2. Ponga la
SINGERStraight stitchingStraight stitching is ideal for seams, darning, backstitching, basting, inserting a zipper, among others.RECOMMENDE
SINGERCostura rectaLa costura recta es apropriada para la unión de las telas, zurcidos, pespuntes, hilvanes, colocar cierres, entre otros.AJUSTES
SINGERZigzag stitchingZigzag stitching may be used for finishing, appliqués, monograms and decorative patterns.To zigzag, position the stit
SINGERCostura zi^zasCouture de zÌ2^0SLa costura zigzag puede ser utilizada para hacer terminaciones, aplicaciones, monogramas, decoraciones y sobreh
SINGERBlind hem stitchingBlind stitching is ideal for finishing hems, replacing manual sewing.RECOMMENDED INITIAL SETTINGSPattern; Blind hem stitch (l
SINGERPuntada invisible Point invisibleLa puntada invisible es muy apropriada para hacer bastas durables, substituyendo la costura manual,AJUSTES INIC
i»llNUtKImportant Safety InstructionsHOW TO REDUCE RISK OF FIRE, ELECTRIC SHOCK OR PERSONAL DAMAGE.AA• This machine has been designed for domestic
Decorative stitch patternsWith your Sewing Machine, you will be able to perform a great variety of decorative stitches used in embellishing of
SINGERPuntosdecorativosPointsdécoratifsCon su máquina 6038, usted puede hacer una serle de costuras decorativas, usadas en bordados de paños de plato,
SINGERFlexible stitch patternsThe Flexible Stitch patterns are ideal to sew knit fabrics and other stretch fabrics.RECOMMENDED INITIAL SETTIN
SINGERPuntos flexibles Points extensiblesEstos puntos se utilizan para coser algodones y otras telas elásticas.AJUSTES INICIALES RECOMENDADOSPosición
SINGEROveredge stitchingThis stitch is used for finishing stretch fabric edges or seams which need more elasticity, such as sleeves, c
SINGERPuntada tipo overlokEsta puntada es muy usada para terminaciones en puntas de telas elásticas o en telas que requieran de una mayorelasticidad
SINGEROne-stepbuttonholeYour machine makes buttonholes to any length you choose inonly one easy step. Follow these instructions before makingbuttonhol
SINGEROjalador automático de 1 pasadaSu máquina hace ojales del tamaño que usted desee yde forma automática en una única y simples pasada.Siga estas
SINGER2. Lower completely the buttonhole engaging lever and push it slightly backwards (illustration 3).3. Place the center of the foot marking agai
SINGER2. Baje totalmente la palanca de encaje de la ojaladora y empújela suavemente hada atrás3. Posicione el centro del rasgo del prénsatela
SINGERImportantes normas de seguridadCOMO REDUCIR EL RIESGO DE INCENDIO, DESCARGA ELECTRICA O DAÑOS PERSONALES:• Esta máquina está proyectada par
SINGERBalancing the buttonholeSome types of fabrics will show different density of stitches on the right or the left side of the but
SINGERRegulación del ojalEn algunos tipos de telas podrá haber una diferencia en la densidad de las puntadas, en los lados derecho e Izquierdo del oja
SINGERAttatching a buttonButtons are easily and quickly attached, with straight stitching and simple zigzag stitching.RECOMMENDED INITIAL SETTINGSPatt
SINGERPegando botones Coudre des boutonsLos botones se pegan de forma muy fácil y rápida, usando la costura recta y el zigzag simple.Les boutons son
SINGER5. Set stitch width to the first mark. Carefully turn the hand wheel to observe if the needle will enter both holes of the
SINGER5. Gire el volante en su dirección hasta que la aguja quede fueradel botón (fig.S).6. En esta posición, efectúe algunas puntadas (fig. 4).7o Pa
SINGERInserting a zipperTo insert a zipper we recommend the use of a zipper foot to allow even stitching.RECOAAMENDED INITIAL SETTINGSPattern: Straigh
SINGERColocación de cremallerasRecomendamos el uso del prénsatelas para cierres, a objeto de lograr una costura uniforme próxima al cierre.AJUSTES INI
StNCERDarningTorn and worn-out clothes may be easily and quickly darned with a bit of practice. If you need more sewing control, you may use a
SINGERZurcidoReprisageRasgos у deshilados en ropas y cortinas pueden ser zurcidos de forma fácil y rápida con un poco de práctica. Siempre que sea
SINGER8S^IIS’S" NiInstructions importantes de sécuritéAA6COMMENT REDUIRE LE RISQUE D’INCENDIE, SECOUSSE ÉLECTRIQUE OU DOMMAGE DES PERSON
SINGERGatheringThis function is used for sleeves, skirts and flounces. RECOMMENDED INITIAL SETTINGSPattern: Straight stitchNeedle position: CenterStit
SINGERRecogidoFronceEl recogido o fruncido es un recurso que causa unefecto muy bueno en mangas, faldas y vuelos.AJUSTES INICIALES RECOMENDADOSTipo de
SINGEROvercastingOvercasting is used to prevent the fabric edges from fraying.RECOMMENDED INITIAL SETTINGSPattern: Zigzag stitch Needle positi
SINGERSobrehiladoSur fi laseEl objetivo del sobrehilado es evitar que las puntas de las telas se deshIlachen.Para envolver las puntas de la tela con u
SINGERMonogram and EmbroideringYou will be able to produce beautiful monograms and embroidering with just a little of practice, creativ
SINGERMonogramas у bordadosCon un poco de habilidad, creatividad у un bastidor (no Incluido), se pueden hacer lindos monogramas y bordados, personal I
SINGERAppliquésAppliqués can be sewn using a satin stitch or a blind stitch.RECOMMENDED INITIALSETTINGSPattern: Zigzagorblind hem stitch Nee
SINGERAplicacionesPueden coserse las aplicaciones usando una puntada acetinada o un dobladillo invisible..AJUSTES RECOMENDADOSTipo de puntada: Zigzag
SINGERTwin needle sewingTwin needle sewing produces straight and parallel zigzag stitches. It may be used for hemming, application of
SINGERCoser con aguja dobleLa aguja doble efectúa dos costuras rectas o zigzag paralelas. Puede aplicarse para confeccionar bastas, aplicación de elás
SINGERTable of ContentsGettinq to know your sewinq machineParts...11Accessories...
SINGERFrench SeamFrench seams are done using a straight stitch and a zipper foot. Begin by stitching the wrong sides of the fabric t
SINGERCostura Francesa Couture FrançaiseSe hacen costuras francesas usando puntada recta y prénsatelas para cremalleras.Comience a coser por
StNCERTopstitchingRECOMMENDED INITIALSETTINGSPattern: Straight Stitch Needle Position: Center Stitch Width: Straight Stitch Length: Variable Foot: Zip
SINGERCosturas de bordes SurpiqûreAJUSTES INICIALES RECOMENDADOSTipo de puntada: Puntada recta Posición de la aguja: Centro Ancho de la puntada: Recta
SINGERLace ApplicationRECOMMENDED INITIALSETTINGSPattern: Zigzag Needle Position: Left Stitch Width: 1.5 to 2 mm Stitch Length: 1 - 2 Foot: General Pu
SINGERAplkacdón de Randa Application de DentelleAJUSTES INICIALES RECOMENDADOS Tipo de puntada: Zigzag Posición de la aguja: Izquierda Ancho de la pun
SINGERBar tackRECOMMENDED INITIALSETTINGSPattern: Straight stitch & ZigZag Needle Position: Center Stitch Width: 2 Stitch Length:! to 1.5 Foot: Ge
SINGERPresUías de BarraBride D'arretAJUSTES INICIALES RECOMENDADOSAJUSTEMENTS INITIELS RECOMMANDESTipo de puntada : Recto Et Zig-zag Posición de
St NGERQuilting functions(Channel, Template, Motif and Stipple Quilting)RECOMMEHf:>ED INITIAL SETTINGSPatterniStraight Stitch Needle Position; Cent
SINGERFunción quìlting(Estilo canal, modelo, adorno y puntada libre)AJUSTES RECOMENDADOSSelección del punto: Puntada recta Posición de la aguja: Centr
Verwandte Produkte und Handbücher für Nähmaschinen Singer 5160
 (44 Seiten)
 (61 Seiten)
(34 Seiten)
(23 Seiten)
(64 Seiten)
(19 Seiten)
(28 Seiten)
(17 Seiten)
(52 Seiten)
(0 Seiten)
(20 Seiten)
(48 Seiten)
(11 Seiten)
(61 Seiten)
(34 Seiten)
(23 Seiten)
(64 Seiten)
(19 Seiten)
(28 Seiten)
(17 Seiten)
(52 Seiten)
(0 Seiten)
(20 Seiten)
(48 Seiten)
(11 Seiten)
© 2020, manymanuals.de. Alle Rechte vorbehalten. | 0.922 s |
 Manymanuals.com
 Manymanuals.de
 Manymanuals.fr
 Manymanuals.it
 Manymanuals.pl
 Manymanuals.cz
 Manymanuals.es
 Manymanuals-pt.com
Kommentare zu diesen Handbüchern